Here’s another quick and easy Halloween craft that little ones will love. And an added bonus- it looks adorable in play rooms for the fall and can make for some really cute photos with kiddos.

FYI- This post may contain affiliate links. All that means is that if you buy something through one of these links you won’t pay a cent more but I might make a small commission.
Supplies:
- Cream Felt
- Colored Felt (purple, green, yellow, orange, white, black)
- Scraps of Iron-On Vinyl (you can use any color, I chose purple, black, orange, and green)
- Cream Embroidery Thread
- Embroidery Needle
- Paperbacked Fusible Web
- Iron or Cricut Mini Heat Press
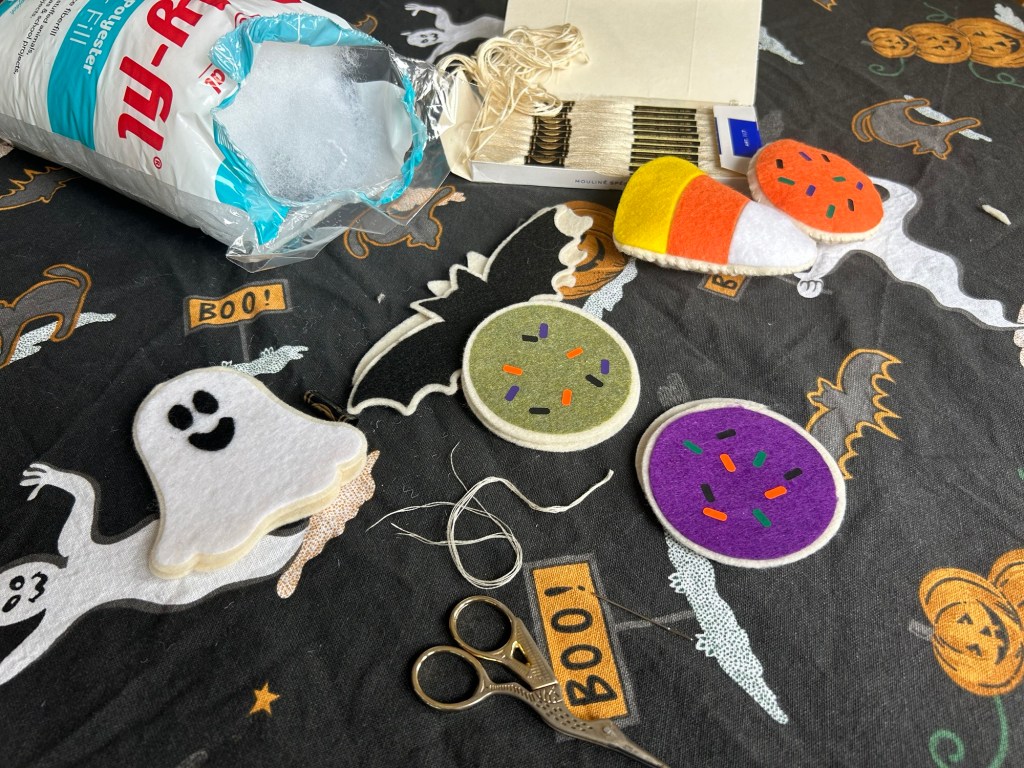
- Poly-fil stuffing
- Cricut Cutting Machine
- Cricut Rotary Blade
This project pattern is available for free on my design space profile. All you need is an active Cricut Design Space subscription to access it. Project linked here.
Steps:
- Access the project design through design space.
- Load the rotary blade into your Cricut machine and select the following settings:
- Material: Felt
- Pressure: More
- **I tried using the standard point cutting blade as that is what is “recommended” on the software for this material but it did not cut well. I consistently have better luck with the rotary blade for felt, even on fine detailed cuts**
- Stick one side of the fusible web to the underside of all of the colored felt pieces you will be using (but not the cream felt). Make sure to leave the paper on the side of the interfacing that is not being attached to the felt. Iron the interfacing onto the felt to attach it permanently.
- Load felt onto a Standard Grip mat – going in whatever color order design space prompts you. Put the paper interfacing side down on the mat, with the felt facing up.
- When prompted to load iron on (for the sprinkles on the Halloween cookies) use standard iron-on settings (mirroring the image) and the standard cutting point blade.
- Once all of the components have been cut, the last prep is to weed the iron on pieces.
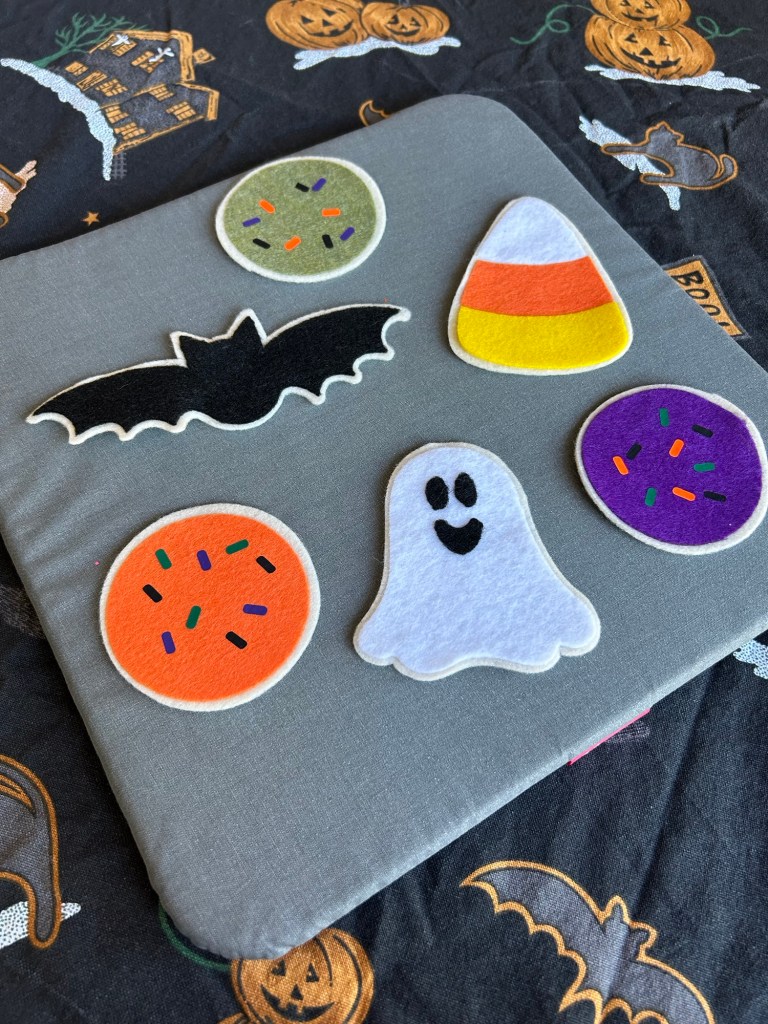
- Begin assembling the felt cookies by ironing on the colored felt shapes onto the cream cut outs of the same shape.
- Iron the iron-on sprinkles onto the round cookies.
- Once all of the tops of the cookies are assembled, grab the base of the cookie in the same shape, and sew the cookie together three quarters around using a whip stitch with the cream embroidery thread.
- Fill the cookie as full as you would like it with poly-fil and finish whip stitching the rest of the cookie.
- Present the toys to your little ones and let them enjoy!

It may seem like a lot of steps when you look at the instructions, but it really comes together fast! You can probably complete it start to finish in under 3 hours, and that’s taking your time.
If you give these a try let me know! And if there are any other fun holiday shapes you’d like to see made, let me know in the comments 🦇🎃👻

Leave a comment