I made these Dragon Eggs as part of the Harry Potter Scavenger Hunt / Escape Room I put on for my husband’s 30th birthday. They’re relatively quick to make (minus the dry time overnight) and require only a few supplies.

FYI – this post contains affiliate links. All that means is that if you buy something through one of these links, you won’t pay a cent more but I might get a small commission.
Supplies
How To
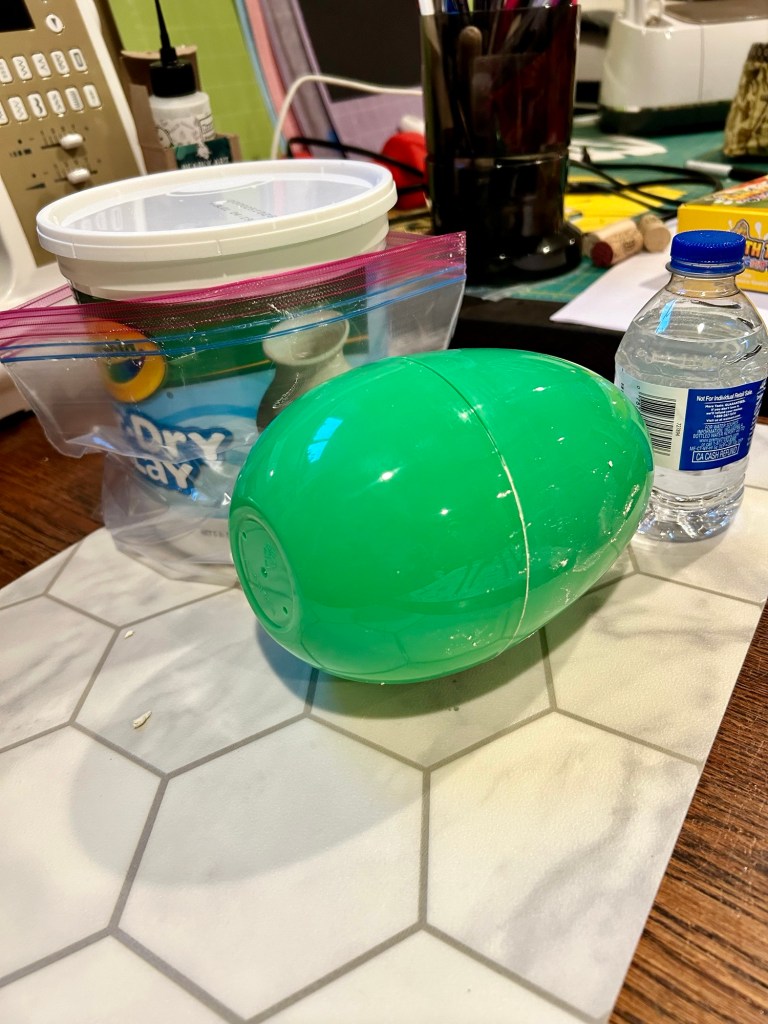
1. Slather air dry clay all over the large Easter eggs in whatever pattern or design you want
**This was my first time using air dry clay so I made several mistakes. A tip for you looking back- keep the design relatively simple, or if you want to do something more complicated like the scaled egg, make the scales on their own and then attach them to the egg with glue after they’ve harden and dried completely. 50% of my scales fell off the next morning when I picked up the egg so I had to reattach them all back on with paint, several layers at a time. It was incredibly defeating at the time so I don’t want you to suffer through that as well.

2. Let it dry overnight
*There was more cracking after they dried than I was expecting so just be prepared for this. It worked fine for the design because it added to the rustic feel of the eggs but just know this might happen.
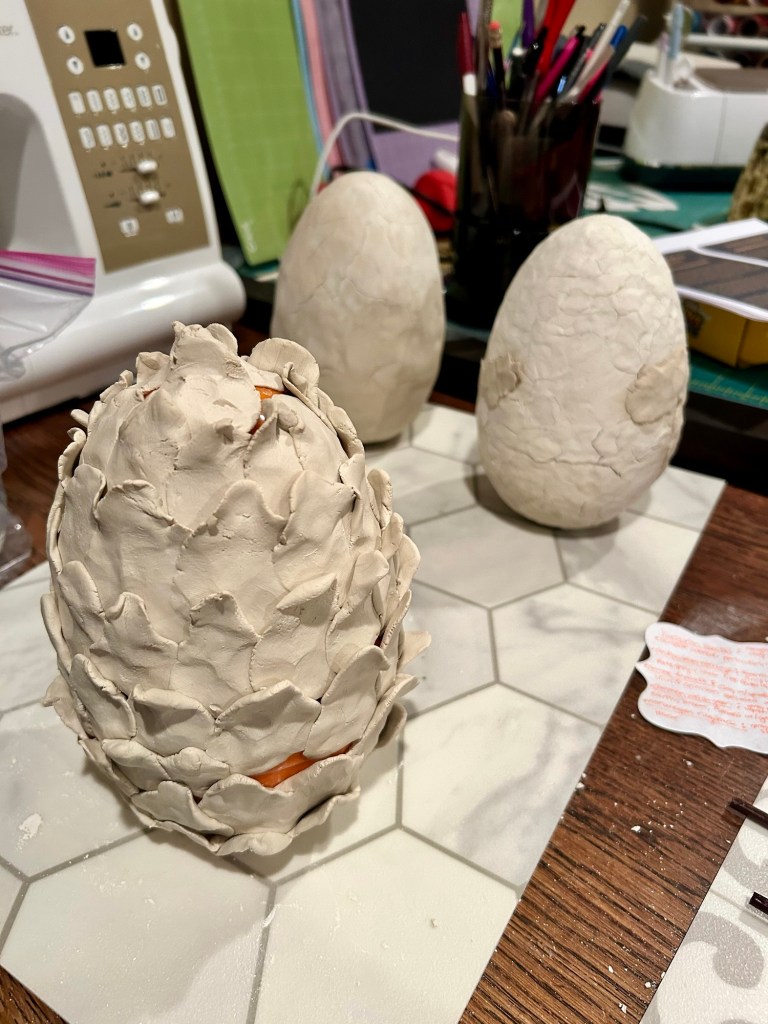
3. Touch up any parts of the eggs that have cracked more than you want or don’t look quite right by adding more clay on top. It helps to wet the existing coat and score it lightly wherever you want to attach more.
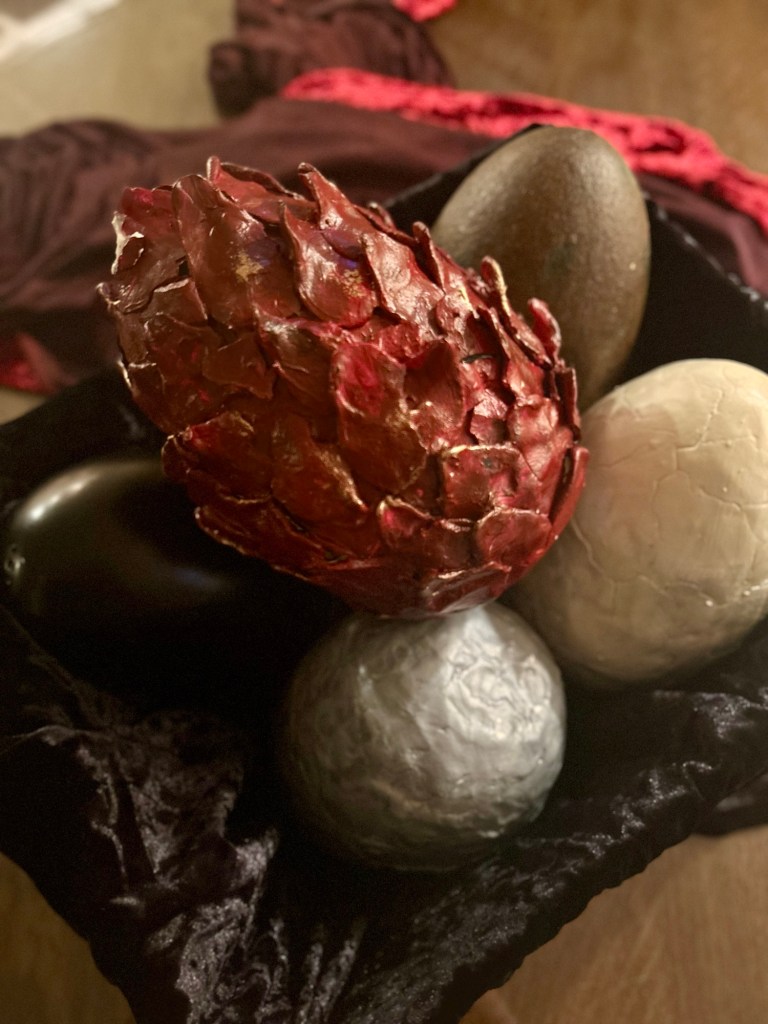
4. Once you are happy with your design and it has dried completely, it’s time to paint it. I used acrylic craft paint that I had on hand. I also spruced up the crimson egg slightly by adding some gold rub and buff to the tops of the scales.
5. After the paint has dried, add several coats of Mod Podge to add to the durability of the eggs, letting the egg dry completely between coats. I did 2-3 coats for each of the eggs. This helps to harden the clay even further so that it stays together and keeps the paint from chipping.
And just like that, you’re done! You have your own super fun and realistic looking dragon’s eggs.
You might also like:

Leave a comment