
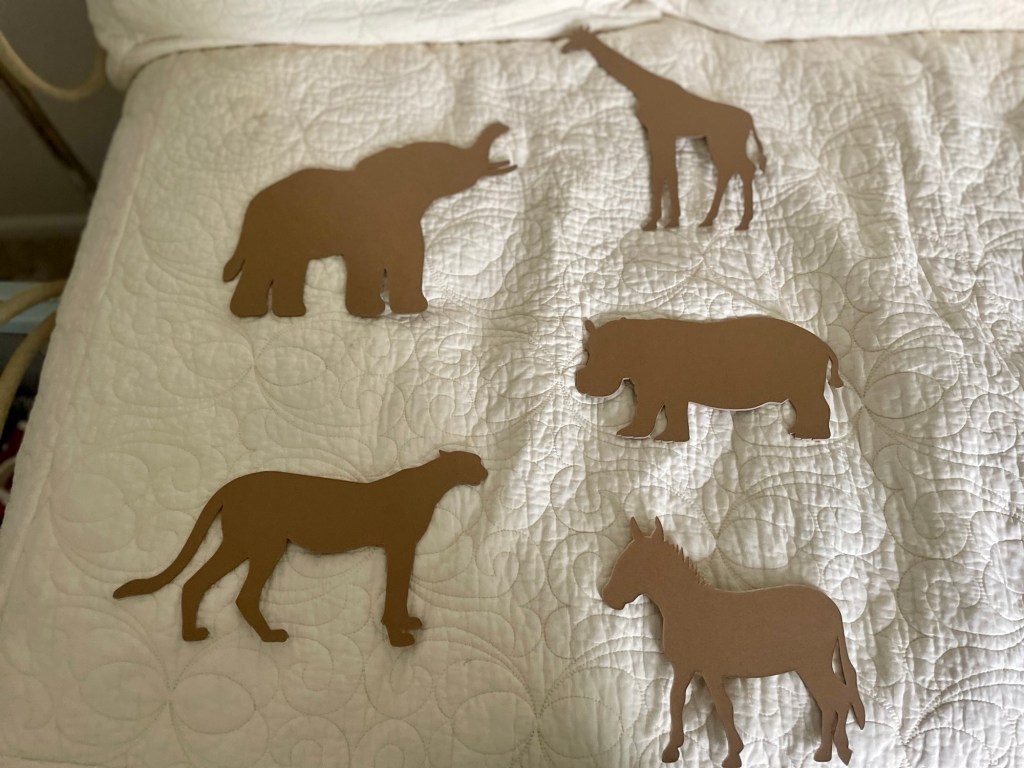
I made these lights in just a weekend using a few supplies and my Cricut Maker and I absolutely LOVE how they turned out! They add the perfect touch to my little girl’s safari themed nursery. And she absolutely loves when I turn them on. She becomes completely mesmerized by the lights and they calm even the biggest of feelings. Here’s exactly how to make them:
FYI – this post contains affiliate links. All that means is that if you buy something through one of these links, you won’t pay a cent more but I might get a small commission.
Supplies:
- Cricut Heavy Chipboard
- Cricut Knife Blade
- White Spray Paint
- Wooden Blocks
- Hot Glue & Glue Gun
- Fairy Lights
- Sandpaper
- Velcro Command Strips
- Superglue
How To:
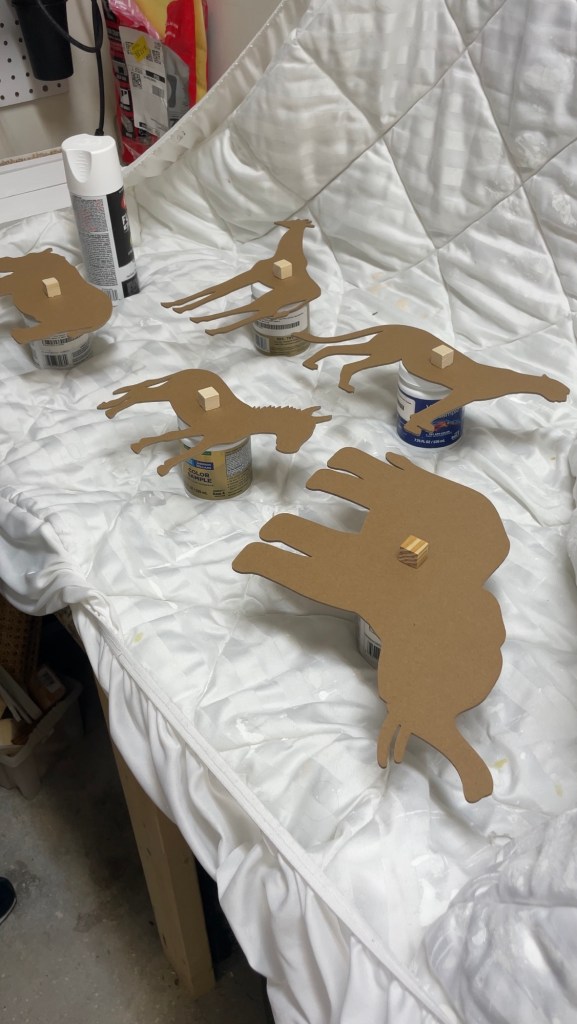
1. Use your Cricut Maker with a knife blade attachment to cut out your desired shapes from Chipboard
**For best results- tape down your chipboard to a heavy duty cutting mat (I used painters tape) to prevent it from moving around while it’s being cut
2. Attach wooden blocks to the back of cut outs so that they will be raised slightly off of the walls. Use superglue or your favorite adhesive
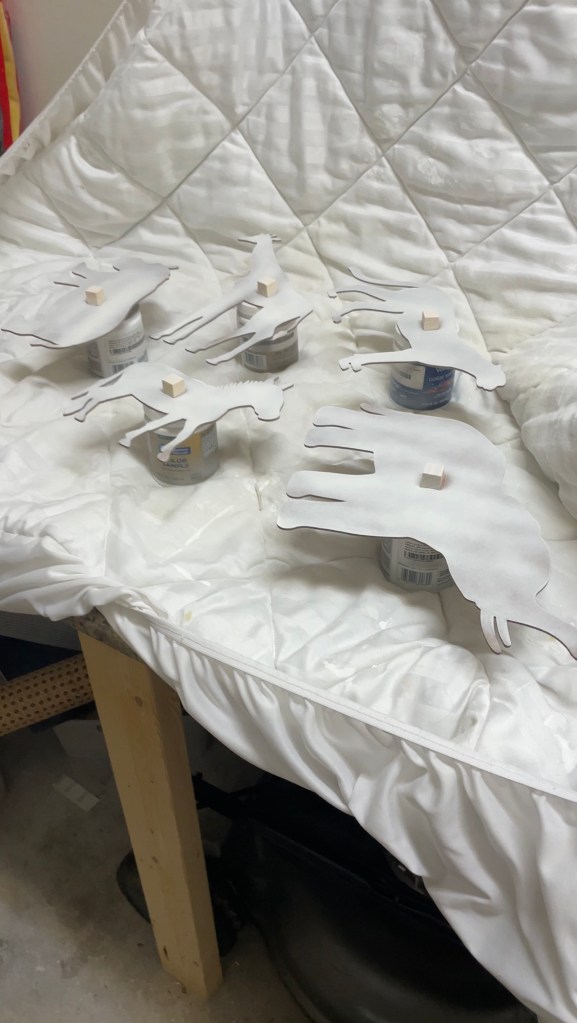
3. Spray paint both front and back of cut outs with white spray paint
**For best results- do several light coats of spray paint on each side to minimize drips or clumping
4. Lightly sand down edges and any imperfections in the paint
5. Attach lights to the back of the cut out using hot glue
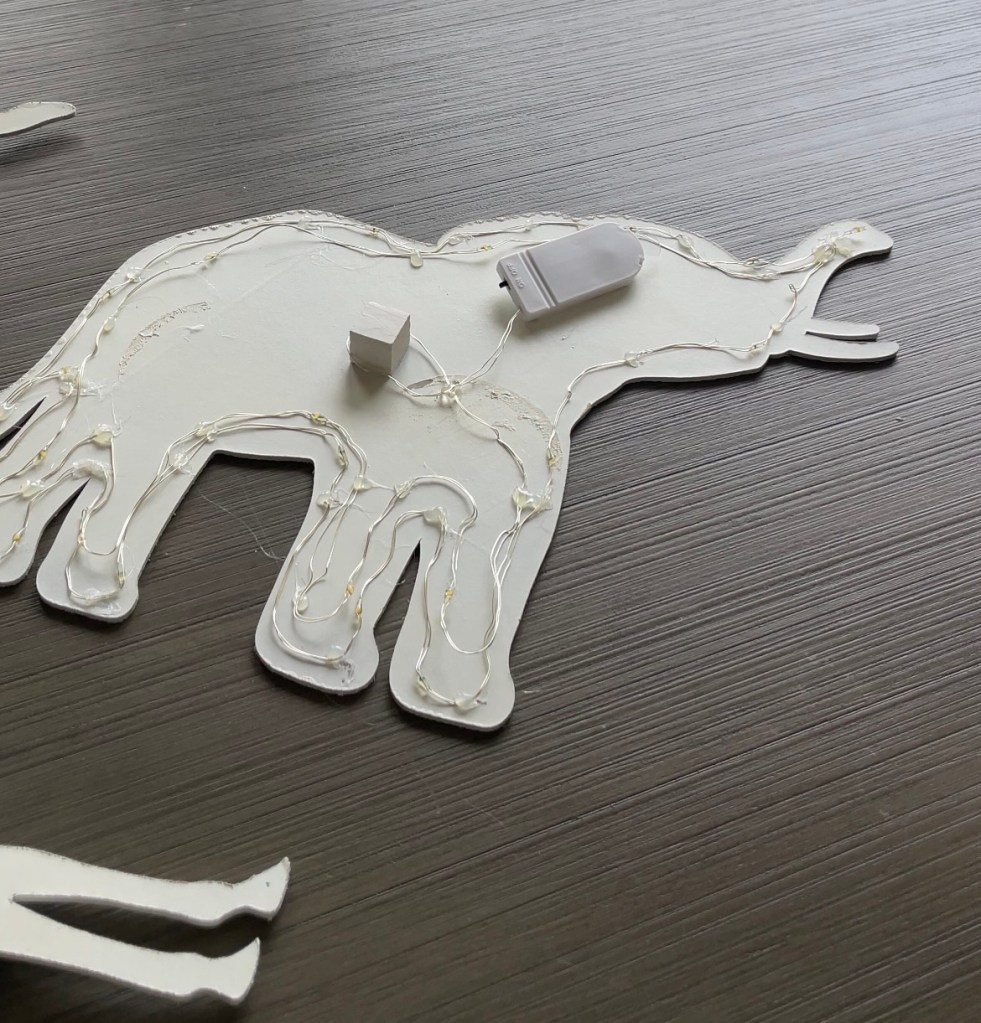
6. Cut velcro strip to size and attach to the wooden blocks on the back of the cut out
7. Put on your wall and enjoy!

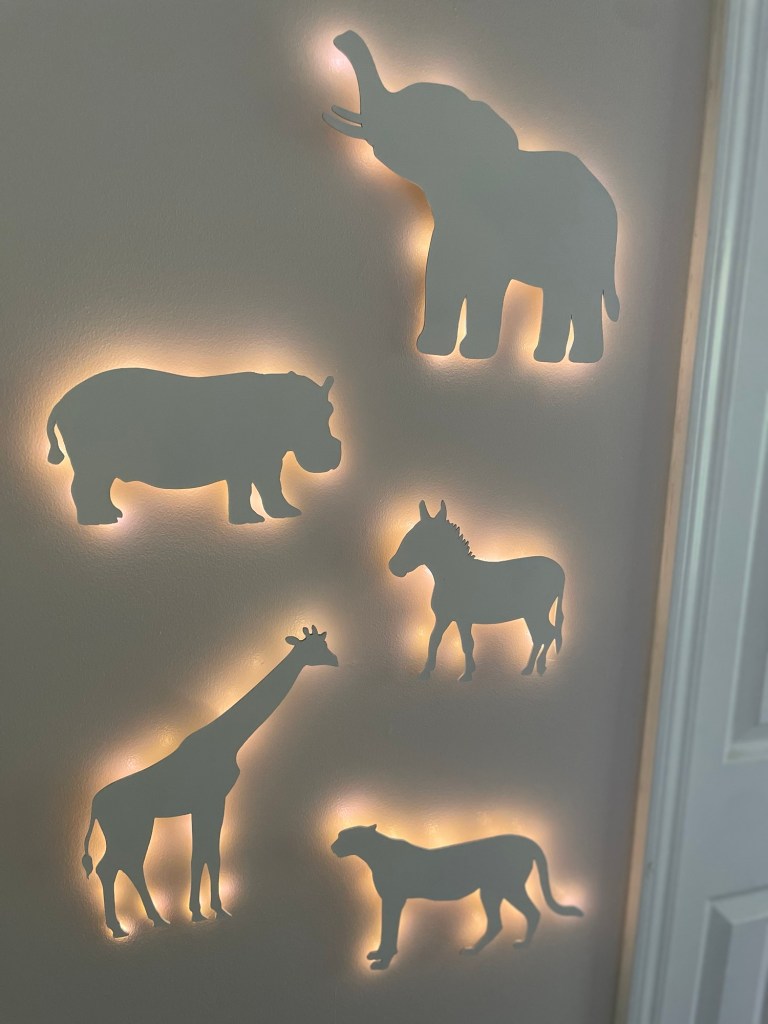
If you want to make these exact cut outs you can find my design accessible on Cricut Design Space, linked here. You just need an active Design Space subscription!
And if you’d prefer to watch a video of the process, I show the steps in more detail on my IG reel here.

Leave a comment