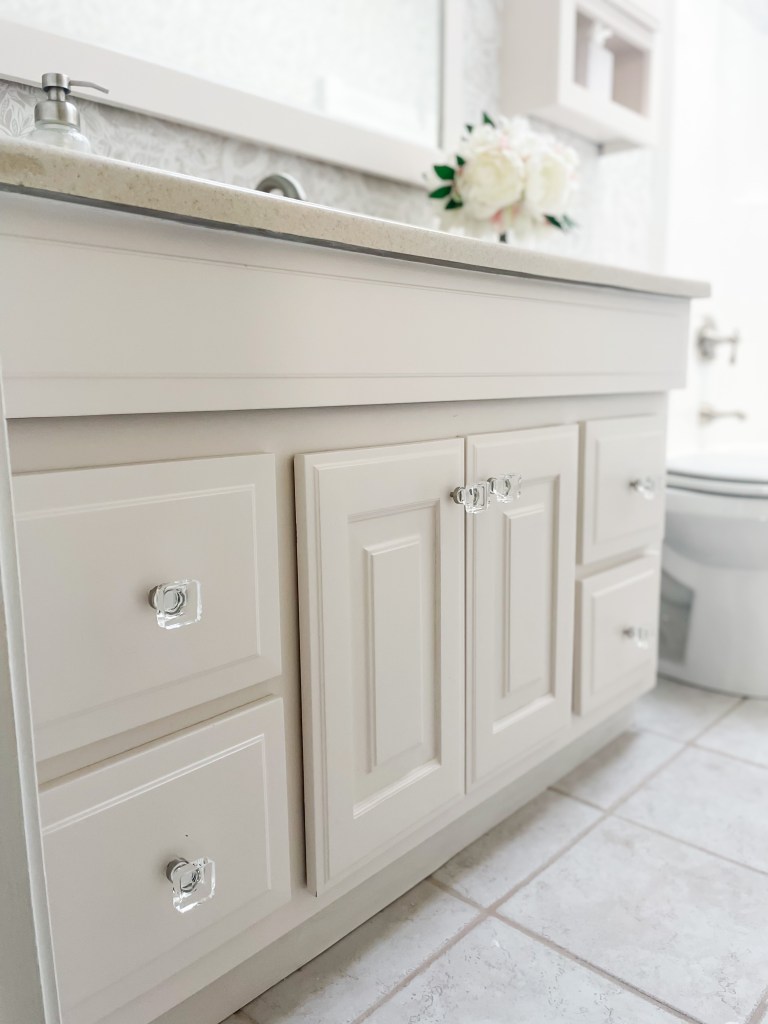
If you thought you had to use a paint sprayer to get a professional finish on painted cabinets, you’re like me a year ago! I though the only way to get a quality look was by using a sprayer, but I didn’t have one and desperately wanted to paint the dated cabinets in my master bath.

The key to making this work is a few different things:
1. Take the time to do the necessary prep. This means thoroughly sanding all sides and grooves of the wood. I used an orbital sander on any flat surfaces including the entirety of the cabinet fronts. For the smaller curved detailing in the molding and details in the cabinet doors I used plain ole sandpaper. Some times that means folding it in half and wedging it in the grooves as best you can. This is by far the most tedious part of the process but it is absolutely necessary. I experimented with one drawer front in the second bathroom we painted like this and skipped sanding. Immediately after installing it there was a chip in the paint so I’m confident the sanding step is worth the time.
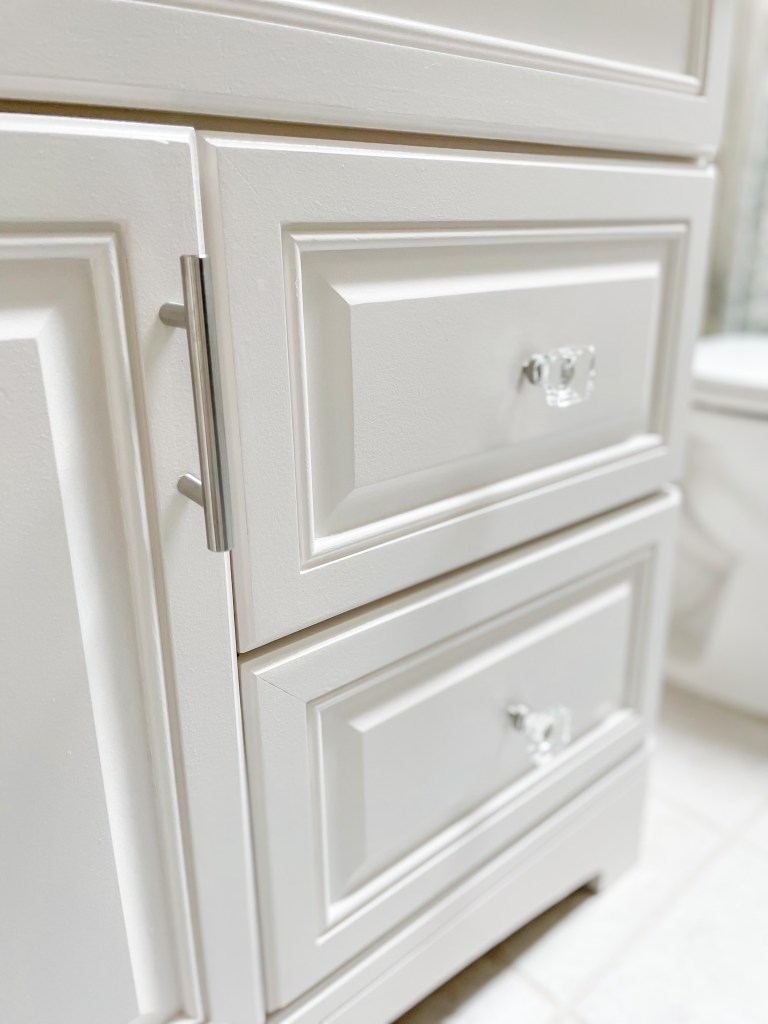
2. Use a quality enamel paint. The reason behind this is it has a self-leveling quality that will help eliminate brush strokes. We used Sherwin Williams Emerald Urethane Trim Enamel in the color Porcelain. This paint is definitely more expensive that a standard paint but it is well worth it! It’s been over a year since we painted that cabinets in our master bath and there’s not a scratch on them! The paint feels a little thicker going on compared to standard paint but as it sits it levels itself out to hide brush strokes and looks like a professional finish straight from a sprayer.
3. Use a high quality roller. You want a “short nap” roller meaning one with a thinner weave. These rollers are designed to hold a smaller amount off pain which leaves a smoother finish. Look for one with a 1/4” NAP. Some guides recommended using a foam roller but when I’ve tried that on some other wood projects I didn’t like the finish as much. So for the cabinets I used a standard woven roller and was perfectly happy with the results.
4. Wait the appropriate drying time. This seems obvious but I also know how tempting it is to jump ahead a little to try and get projects finished within a day. Cabinet paint requires a longer drying time between coats which can feel frustrating when you want to make progress, but leaving the appropriate amount of time between coats will ensure you get the best finish. This is the time when it’s doing all the self-leveling so if you rush to the next coat you may end up with more visible brush strokes.
5. Sand very lightly between coats. Do this by hand rather than using an electric sander. The purpose is just to get off any drips or imperfections in your previous painting coat. There weren’t many big visible spots that needed sanding but this makes an incredibly smooth surface for the 2nd coat to go on.
In addition to the 5 Must Do steps to this process, these are the supplies that I used, all linked on Amazon for ease of buying if you don’t already have them.
FYI – this post contains affiliate links. All that means is that if you buy something through one of these links, you won’t pay a cent more but I might get a small commission.
Supplies:
– Orbital sander
– Sand paper refills (I used this both on the sander and when I was sanding by hand)
– Low NAP paint roller
– Paint brush (for the grooves and small spaces on the cabinets)
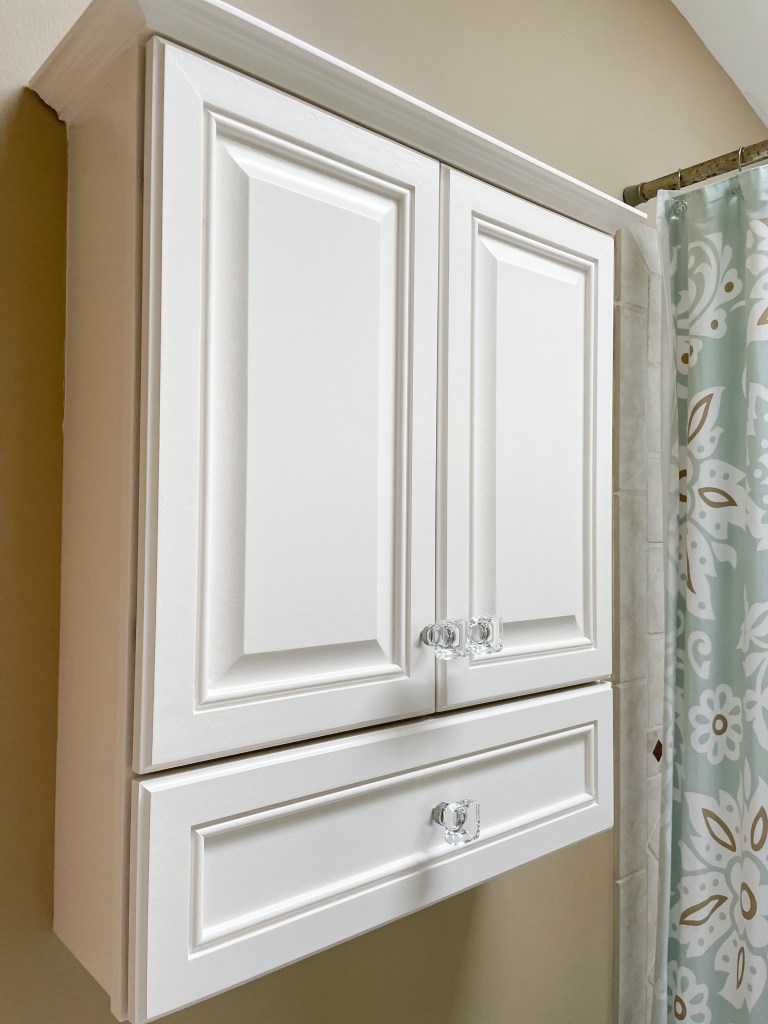
I have now replicated this process on my guest bath cabinets and it worked just as well!
I’ve got detailed tutorials saved in my highlights and reels on IG so feel free to check it out for more tips & tricks! Watch videos here.

Leave a comment